INSTALL INSTRUCTIONS
CLICK HERE for a PDF download of our INSTALLATION GUIDE!
STEP 1Mark the layout line and center points of each porch post and newel post prior to installation. This is very important to ensure the accurate length for installing.
STEP 2 WOOD DECKING INSTALLATION:
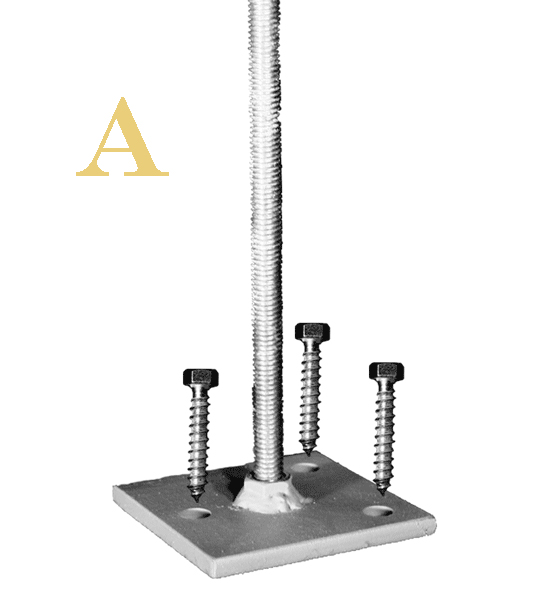
1. Install blocking under where each newel's floor flange will be located.
2. Locate and center each floor flange and secure using 3/8" lag bolts.
3. Thread the 1/2" x 48" rod into the welded nut on the floor flange and tighten using vise grips. See example A.
CONCRETE INSTALLATION:
1. Mark anchor hole in floor flange. Drill a 3/8" hole 1 1/4" deep into the cured concrete.
2. Insert anchor and using a punch, set the anchor pin. See example A.
STEP 3
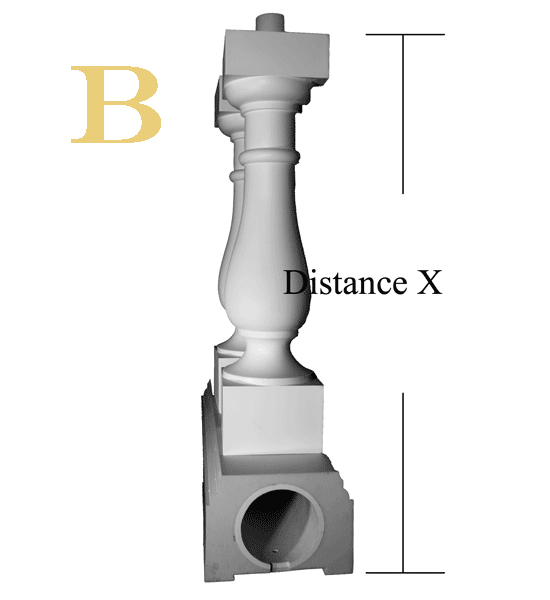
1. Measure and combine the heights of the bottom rail and baluster (Distance X, see example B). This is the distance between the bottom of the angle brackets used to fasten railings to posts.
2. Mark the location and height of the bottom rail from the concrete or wood surface (Distance B, see example C).
3. Using the measurement of the rail and baluster (Distance X, see example C), locate the bottom of the top bracket.
4. Mark the top and bottom bracket on the newel post.
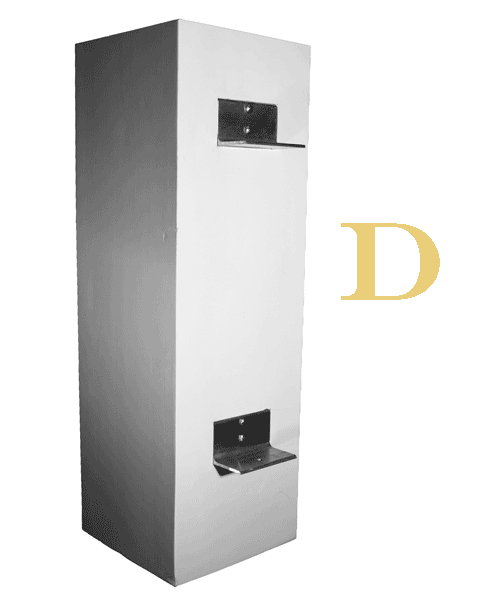
5. Mortise the newel post so that the face of the angle brackets are inset and are flush with the surface of the newel post.
6. Drill holes and secure angle brackets with #14 x 2 self tapping screws. See example D.
STEP 4
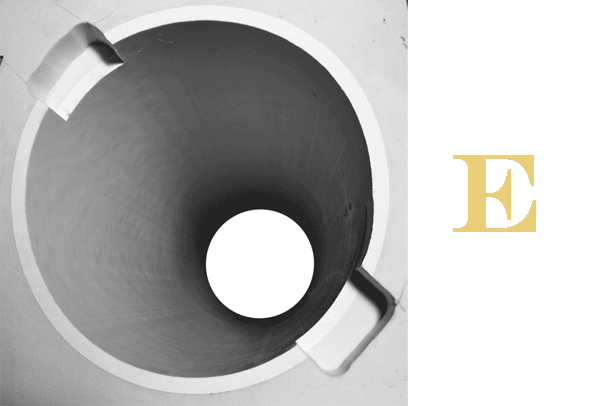
1. Rout the top of the newel post to accept the C-channel. See example E.
2. If trim collars are being used, slide them on the bottom before placing the newel post over the floor flange.
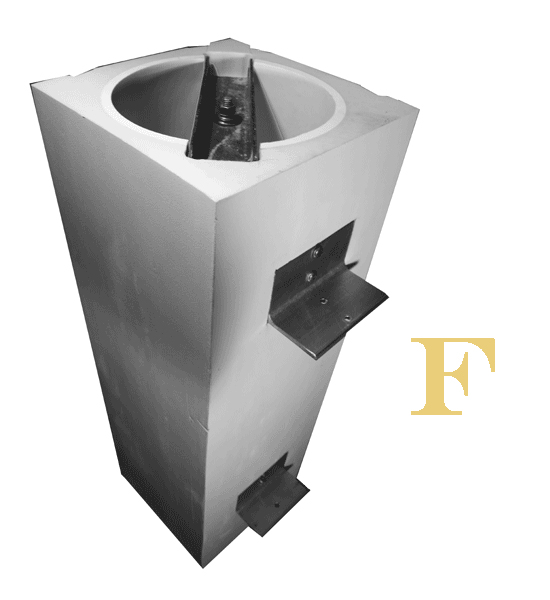
3. Put the C-channel in place and secure loosely with the nut and lock washer. See example F.
STEP 5
1. Determine your rail length.
2. Cut top and bottom rail to proper size.
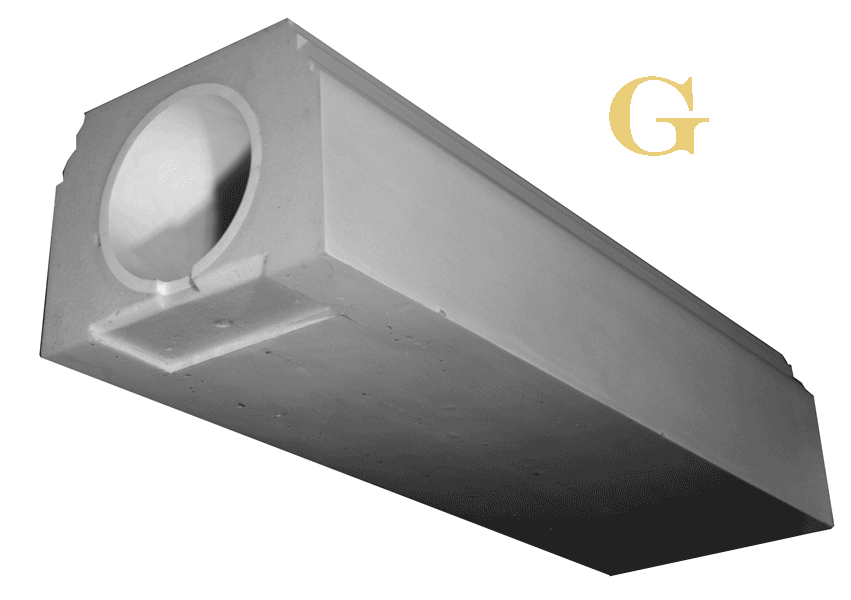
3. Mortise the bottom of each rail to accept the 2 1/2" aluminum angle. See example G.
4. Drill a single 5/16" hole in the bottom rail that corresponds with the single 5/16" threaded hole on the bottom 2 1/2" x 2 1/2" aluminum angle.
5. Mark a center line on rails. Mark the position of each baluster then drill a hole to accept the PVC pipe that extends out either end of the baluster. Standard hole saws work well for drilling these holes.
STEP 5
6. Apply a bead of urethane adhesive to the bottom of each baluster and place the balusters in the holes of the bottom rail. Apply a bead of urethane adhesive to the tops of each baluster and set the top rail on the balusters. See example H. Clamp together using strap clamps, making sure baluster blocks are square to the bottom and top rail. A straight strip of plywood wedged between the baluster blocks and strap clamps helps to align baluster blocks straight and parallel to the top and bottom rail.
7. Allow the adhesive to set for 12 hours.
STEP 6
1. Remove the strap clamps from completed railing section.
2. Apply a small bead of urethane adhesive to the aluminum angles that are fastened to the newel posts, and to the ends of each top and bottom rail.
3. Leave the newel posts loose so you can slide the glued up rail section between them without smearing glue on exposed parts of the newel post.
4. Fit the mortises on the undersides of the rail onto the 2 1/2" x 2 1/2" aluminum angle that is mounted to the newel post.
5. Predrill 1/8" holes through the holes in the top aluminum plates into the PVC pipe. Install 2 #14 x 2" pan head self tapping screws.
6. Thread the 5/16" x 1 1/4" bolt through the bottom plate and into the 5/16" hole you drilled in the underside of the bottom rail. (*Note: This 5/16" threaded bolt does not provide downforce. It is intended to keep the rail from moving laterally. Typical installations do not have enough room between the decking and the underside of the bottom rail for the use of screws.)
7. After securing rail section to newel posts tighten up the nut on the newel post, securing it to the deck.
8. Apply a small bead of urethane adhesive to the top of the newel post and glue the newel cap in place. Small brad nails will keep the cap aligned until the glue sets.
STEP 7
1. After the glue dries, clean off excess with a sharp putty knife. Caulk any cracks with a good quality latext paint-able caulk.
2. Haas Architectural Millwork, Inc. recommends applying a finish coat of latex paint to your railing system.